
Hey there, fellow code wranglers and server tamers! Buckle up, because we’re about to embark on a glorious journey – installing our very own self-hosted GitLab with a trusty GitLab Runner on top of the tiny yet mighty K3s, all while spicing things up with a custom TLS certificate configuration.
Po (holding a giant wrench): “There is no secret ingredient to self-hosting GitLab… except maybe a little kung fu hustle!”

Now, before we dive in, a word of warning: this might get a little technical. But fear not, for I, your friendly neighborhood DevOps engineer (with a serious case of meme addiction), will guide you through the process with enough humor and helpful visuals to make even the most complex configurations feel like a walk in the park… or a victory lap around a server room, whichever floats your boat.

Why Self-Host, You Ask?
Because, my friends, freedom! No more relying on flaky cloud services or fighting for resources. With self-hosting, you’re the captain of your own DevOps destiny. Plus, it’s a fantastic learning experience (and a great way to impress your colleagues at the next virtual watercooler chat… or, you know, send them slightly concerned glances about your newfound DevOps skills 😎).
The Ingredients (Because We Don’t Code on Empty Stomachs):
- A bunch of VMs (preferably one that doesn’t double as your toaster)
- K3s – the lightweight Kubernetes distribution that’s like the tiny, adorable martial arts master of the container orchestration world (think: Kubernetes meets Yoda)
- Self-hosted GitLab – the crown jewel, where all your code magic happens ✨
- GitLab Runner – your tireless build automation buddy, ready to execute your CI/CD pipelines with lightning speed ⚡
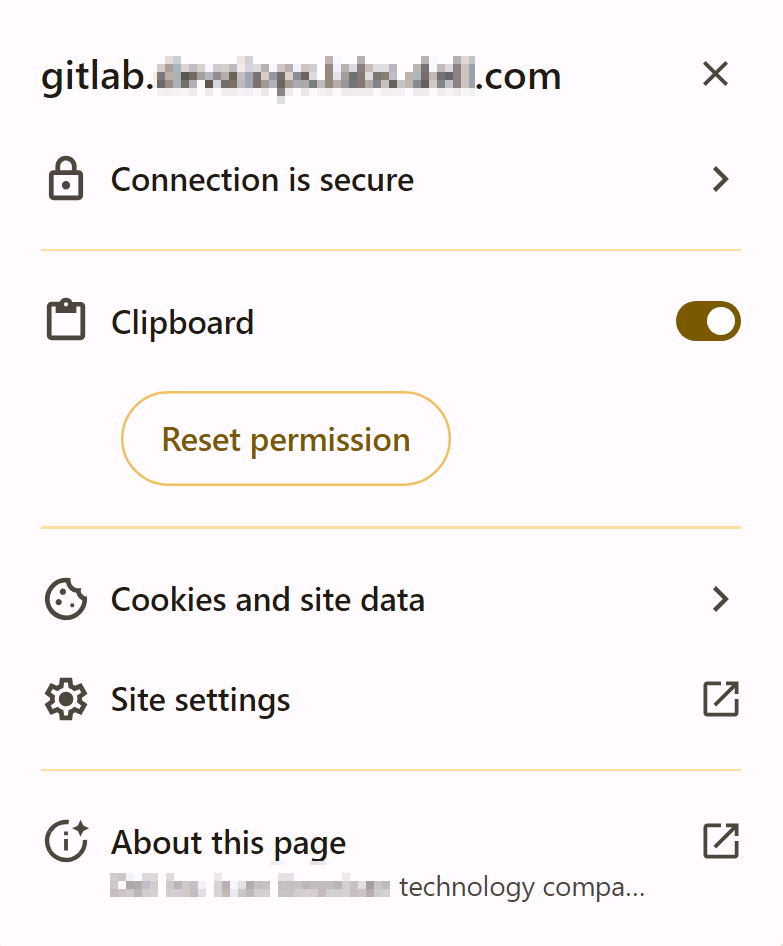
- A custom TLS certificate – the security shield that keeps the bad guys out and also avoids painful clicks in your browser every time you access Gitlab (think of it as a digital bouncer with a very strict dress code) ️
Step 1: Installing K3s – It’s K3s-y!
This is where things get fun. We’ll follow the K3s installation guide here.
Step 2: Custom TLS – Because Security is Still Serious Business (But Way More Metal Now)
This is where things get a little more hands-on. Instead of Let’s Encrypt, we’ll be using your battle-axe sharp custom TLS certificate and its trusty squire, the private key (PEM file). Here’s the breakdown:
- Prepare Your Weapons: Make sure you have both the certificate file (CRT) and the private key file (PEM) readily available. These are the digital guardians that will keep unauthorized users at bay.
- Mount the Cavalry: We’ll need to mount these files as secrets within the GitLab deployment on K3s. This ensures they are securely accessible to the application but hidden from prying eyes.
# Create generic secret
sudo kubectl create secret generic gitlab-tls-secret \
  --namespace gl \
  --from-file=/root/devops/certs/devops.crt

# Create TLS secret
sudo kubectl create secret tls example-tls-secret \
  --namespace gl \
  --cert=/root/certs/devops.pem \
  --key=/root/certs/devops.key
Step 3: Deploying GitLab – Let the Code Flow!
Here comes the big kahuna! We’ll leverage the power of Helm charts to deploy GitLab on our K3s cluster provided by GitLab. Think of Helm charts as pre-made recipes for deploying complex applications on Kubernetes – like having a personal DevOps sous chef at your beck and call.
Here are the commands to spin up GitLab
helm upgrade --install gitlab gitlab/gitlab \
  --namespace gl \
  --set global.hosts.domain=gitlab.example.com \
  --set global.hosts.gitlab.path=gitlab \
  --set global.hosts.disableCertmanager=true \
  --set certmanager-issuer.email=dummy@example.com \
  --set global.hosts.secretName=example-tls-secret \
  --set gitlab-runner.runners.privileged=true \
  --set global.edition=ce \
  --set gitlab.webservice.ingress.tls.secretName=example-tls-secret \
  --set global.ingress.tls.secretName=example-tls-secret \
  --set global.smtp_enabled=true \
  --set global.smtp.address='smtp-outbound.example.com' \
  --set global.smtp.port=25 \
  --set global.smtp.domain='smtp-outbound.example.com' \
  --set global.smtp.tls=false \
  --set global.smtp.openssl_verify_mode='none' \
  --set global.email.display_name='DevOps Gitlab' \
  --set global.email.from='no_reply@example.com' \
  --set global.email.reply_to='no_reply@example.com' \
  --set global.tls.secretName=example-tls-secret
Step 4: Unleash the GitLab Runner – Build Like a Boss!
With GitLab up and running, it’s time to unleash the GitLab Runner. We’ll use the Helm chart magic again to deploy the Runner and configure it to talk to our shiny new GitLab instance.
# Create generic secret
sudo kubectl create secret generic gitlab-cert \
  --namespace gitlab-runner \
  --from-file=/root/certs/devops.pem
For GitLab Runner to function, your configuration file must specify the following:
gitlabUrl: The GitLab server full URL to register the runner against. For example,https://gitlab.example.com.rbac: { create: true }: Create RBAC rules for the GitLab Runner to create pods to run jobs in. If you have an existingserviceAccountyou prefer to use, you should also setrbac: { serviceAccountName: "SERVICE_ACCOUNT_NAME" }. For more information about the minimal permissions required for theserviceAccount, see Configure runner API permissions.runnerToken:- The authentication token you obtain when you create a runner in the GitLab UI.
- Set the token directly or store it in a secret.
- Set the certsSecretName in order to pass custom certficates for GitLab Runner to use
Provide resource name for a Kubernetes Secret Object in the same namespace,
this is used to populate the /etc/gitlab-runner/certs directory
ref: https://docs.gitlab.com/runner/configuration/tls-self-signed.html#supported-options-for-self-signed-certificates
#
certsSecretName: gitlab-cert
Read more from Gitlab documentation
# Create new namespace and install gitlab-runner separately
helm upgrade --install  gitlab-runner -f values.yaml gitlab/gitlab-runner -n gitlab-runner
After gitlab-runner installation, gitlab runner won’t run 😡
Master Oogway (wearing a server admin hat): “Yesterday you struggled with deployments, tomorrow you may face bugs. But today, focus on configuring your TLS certificate with inner peace.”

❯ kgp -n gitlab-runner
NAME READY STATUS RESTARTS AGE
gitlab-runner-8b54596c8-hmdgg 0/1 Running 5 (68s ago) 9m29s
❯ kl -n gitlab-runner gitlab-runner-8b54596c8-hmdgg
Registration attempt 1 of 30
Runtime platform arch=amd64 os=linux pid=14 revision=44feccdf v
WARNING: Running in user-mode.
WARNING: The user-mode requires you to manually start builds processing:
WARNING: $ gitlab-runner run
WARNING: Use sudo for system-mode:
WARNING: $ sudo gitlab-runner…
<<<REDACTED>>>
PANIC: Failed to verify the runner.
Registration attempt 17 of 30
Runtime platform arch=amd64 os=linux pid=272 revision=44feccdf
WARNING: Running in user-mode.
WARNING: The user-mode requires you to manually start builds processing:
WARNING: $ gitlab-runner run
WARNING: Use sudo for system-mode:
WARNING: $ sudo gitlab-runner…
Merging configuration from template file “/configmaps/config.template.toml”
ERROR: Verifying runner… failed runner=SGpPs5Spu status=couldn’t execute POST example.com/api/v4/runners/verify: Post “https://gitlab.example.com/api/v4/runners/ certificate: x509: certificate signed by unknown authority
PANIC: Failed to verify the runner.
Quit (core dumped)
To fix the issue modify the below configmap file
# kubectl edit cm -n gitlab-runner gitlab-runner
<<<redacted >>>
config.template.toml: |
[[runners]]
executor = "kubernetes"
builds_dir = "/cache"
cache_dir = "/cache"
tls-ca-file = "/home/gitlab-runner/.gitlab-runner/certs/devops.pem" <<< Change to this path
[runners.kubernetes]
namespace = "gitlab-runner"
terminationGracePeriodSeconds = 5
privileged = true
tls_verify = false
skip-tls-verify = true <<< Add this line
allow_privilege_escalation = true
image = "ubuntu:22.04"
[[runners.kubernetes.volumes.pvc]]
name = "gitlab-runner"
mount_path = "/cache"
Step 5: Let’s Test Drive!
Here’s the .gitlab-ci.yml standard template file
image: ubuntu:22.10
before_script:
  - echo "Before script section"
  - echo "For example you might run an update here or install a build dependency"
  - echo "Or perhaps you might print out some debugging details"

after_script:
  - echo "After script section"
  - echo "For example you might do some cleanup here"

build1:
  stage: build
  tags:
    - k3s
  script:
    - echo "Do your build here"

test1:
  stage: test
  tags:
    - k3s
  script:
    - echo "Do a test here"
    - echo "For example run a test suite"

test2:
  stage: test
  script:
    - echo "Do another parallel test here"
    - echo "For example run a lint test"

deploy1:
  stage: deploy
  script:
    - echo "Do your deploy here"
  environment: production
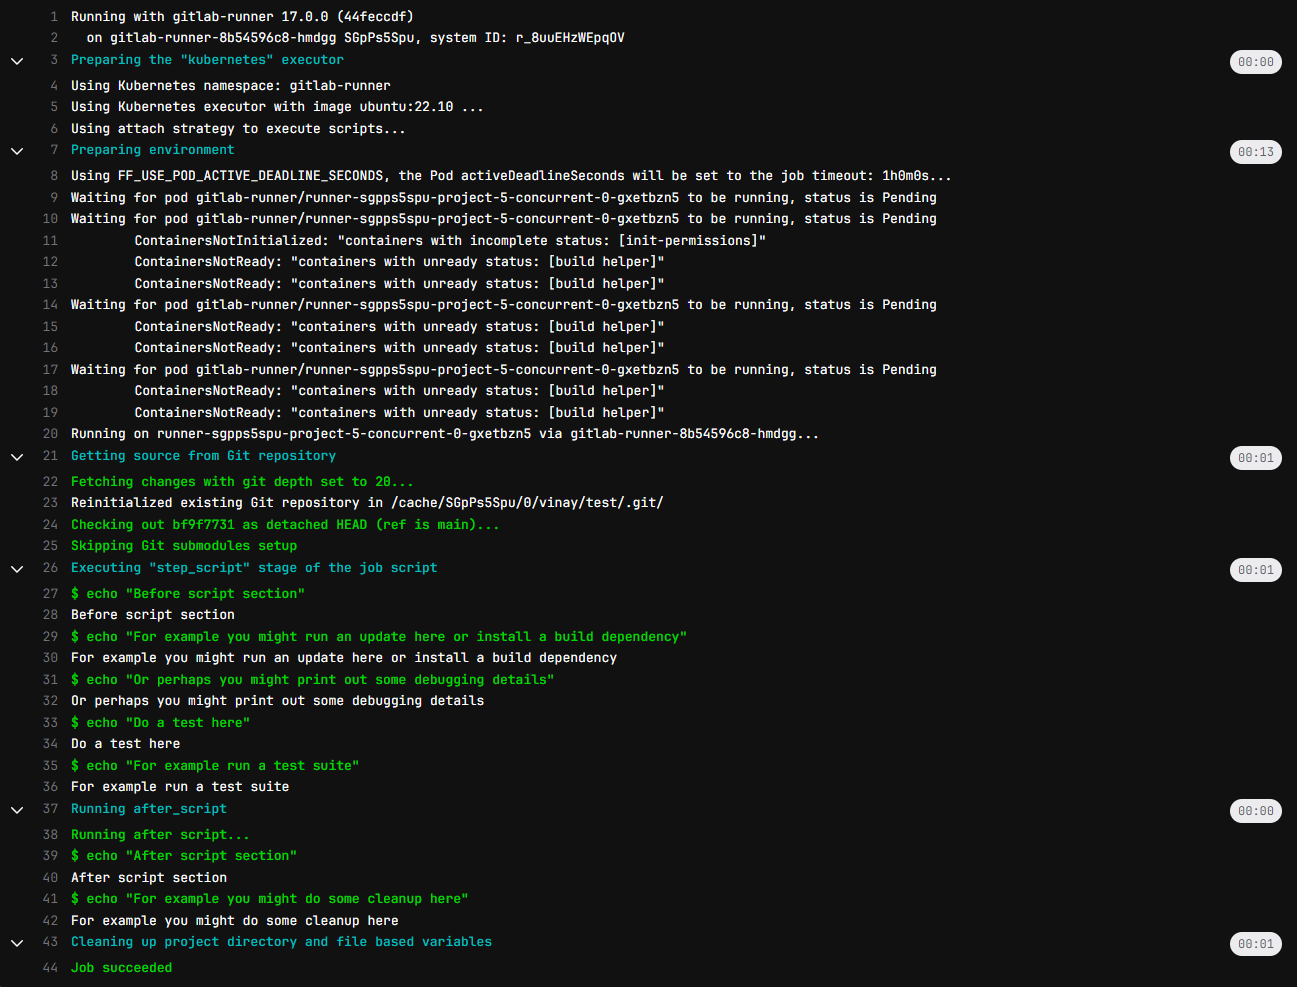
and the Output/Outcome is as under… As you can it was not a cakewalk… I’ve failed 91 times and succeeded on the 92nd attempt. “Keep calm and carry a wand.” — A.W. Jantha

Step 6: Victory Lap – You Did It!
Congratulations, brave adventurer! You’ve successfully self-hosted GitLab and GitLab Runner on K3s, complete with a custom TLS configuration. Now, go forth and conquer your CI/CD pipelines with newfound confidence (and maybe a celebratory dance break).
Bonus Round: Troubleshooting – Because Things Don’t Always Go According to Plan
Let’s be honest, things might not always work perfectly on the first try with a personal track record of 91 attempts!! But fear not, for I’ve included a troubleshooting section with helpful tips and resources to get you back on track. “Debugging is like being the detective in a crime movie where you are also the murder suspect.” – Moshe Feder (Because troubleshooting your self-hosted setup might feel like a never-ending mystery)
# Checking the logs of Pod is the best way to start
kubectl logs -n gitlab-runner gitlab-runner-8b54596c8-hmdgg
# Describe Pod
kubectl describe -n gitlab-runner pod gitlab-runner-8b54596c8-hmdgg
# kubectl edit cm -n gitlab-runner gitlab-runner
Edit the configuration accordingly...
# Login to the container and check
kubectl exec -it -n gitlab-runner gitlab-runner-8b54596c8-hmdgg -- bash
gitlab-runner-8b54596c8-hmdgg:/$ cat /home/gitlab-runner/.gitlab-runner/config.toml
concurrent = 100
check_interval = 10
log_level = "debug"
connection_max_age = "15m0s"
shutdown_timeout = 0

[session_server]
  session_timeout = 1800

[[runners]]
  name = "gitlab-runner-8b54596c8-hmdgg"
  url = "https://gitlab.example.com"
  id = 13
  token = "glrt-SGpPs5SpuGbYwfU9dzpB"
  token_obtained_at = 2024-06-22T10:46:19Z
  token_expires_at = 0001-01-01T00:00:00Z
  tls-ca-file = "/home/gitlab-runner/.gitlab-runner/certs/devops.pem"
  executor = "kubernetes"
  builds_dir = "/cache"
  cache_dir = "/cache"
  [runners.custom_build_dir]
  [runners.cache]
    MaxUploadedArchiveSize = 0
    [runners.cache.s3]
    [runners.cache.gcs]
    [runners.cache.azure]
  [runners.kubernetes]
    host = ""
    bearer_token_overwrite_allowed = false
    image = "ubuntu:22.04"
    namespace = "gitlab-runner"
    namespace_overwrite_allowed = ""
    namespace_per_job = false
    privileged = true
    skip-tls-verify = true
    allow_privilege_escalation = true
    node_selector_overwrite_allowed = ""
    node_tolerations_overwrite_allowed = ""
    pod_labels_overwrite_allowed = ""
    service_account_overwrite_allowed = ""
    pod_annotations_overwrite_allowed = ""
    [runners.kubernetes.init_permissions_container_security_context]
      [runners.kubernetes.init_permissions_container_security_context.capabilities]
    [runners.kubernetes.build_container_security_context]
      [runners.kubernetes.build_container_security_context.capabilities]
    [runners.kubernetes.helper_container_security_context]
      [runners.kubernetes.helper_container_security_context.capabilities]
    [runners.kubernetes.service_container_security_context]
      [runners.kubernetes.service_container_security_context.capabilities]
    [runners.kubernetes.volumes]

      [[runners.kubernetes.volumes.pvc]]
        name = "gitlab-runner"
        mount_path = "/cache"
    [runners.kubernetes.dns_config]

# Check the status of the Pod after the necessary changes
kgp -n gitlab-runner
NAME                            READY   STATUS    RESTARTS       AGE
gitlab-runner-8b54596c8-hmdgg   1/1     Running   10 (17h ago)   17h
Remember: This guide is meant to be informative and lighthearted. Always refer to the official documentation for detailed instructions. But hey, with a little humor and these handy tips, you’ll be self-hosting GitLab and Gitlab-Runner with TLS like a pro in no time!
If you enjoyed this post, I’d be very grateful if you’d help it spread by emailing it to a friend, or sharing it on Social Media Platforms. Thank you!
What am I missing here? Let me know in the comments and I’ll add it in! OR tweet it to me @babvin
